
You might be wondering:
How can I actually align objects in PowerPoint so my slides look clean and professional?
In today’s piece of content, you will learn how to do just that.
This is a guest post by Camille Holden, Co-Founder at Nuts & Bolts Speed Training.
—————-
Here comes Camille:


Camille talks:
If you build PowerPoint slides on a regular basis, you’ve certainly faced this deadly foe before…
Perhaps you battle with him every single day and have yet to discover his weakness. Or perhaps you’ve defeated him on most occasions but he still lurks in the shadows, waiting for your guard to drop and or for the scenario to shift…
What is this mysterious enemy to great PowerPoint slide design?
His name is simply ‘misalignment’.
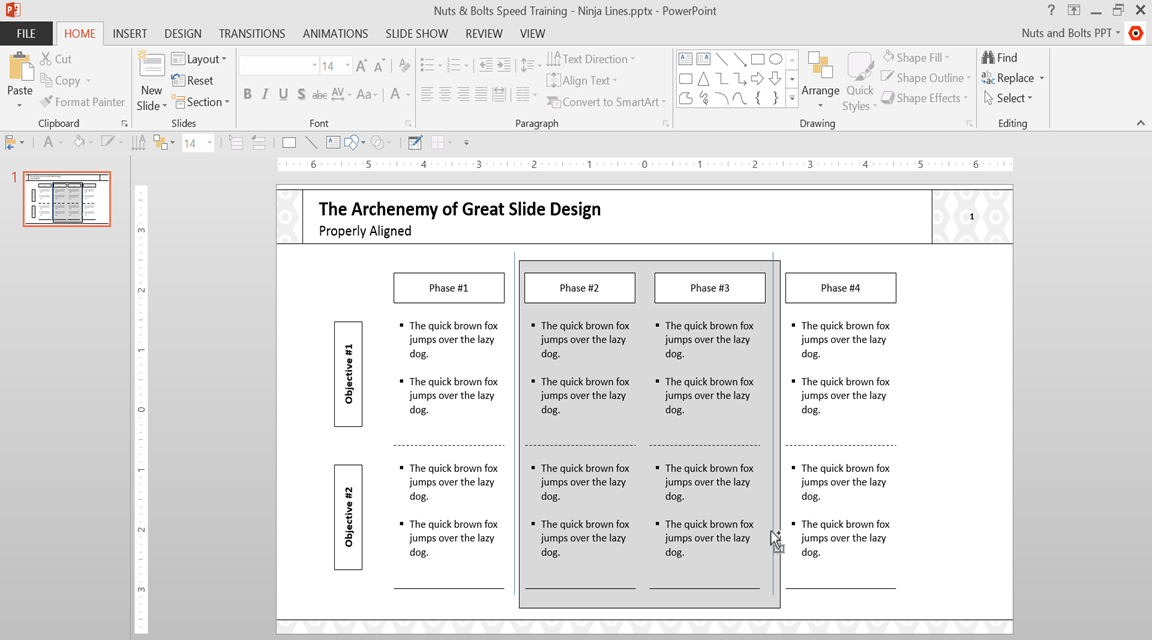
And here’s what it looks like after he’s struck…
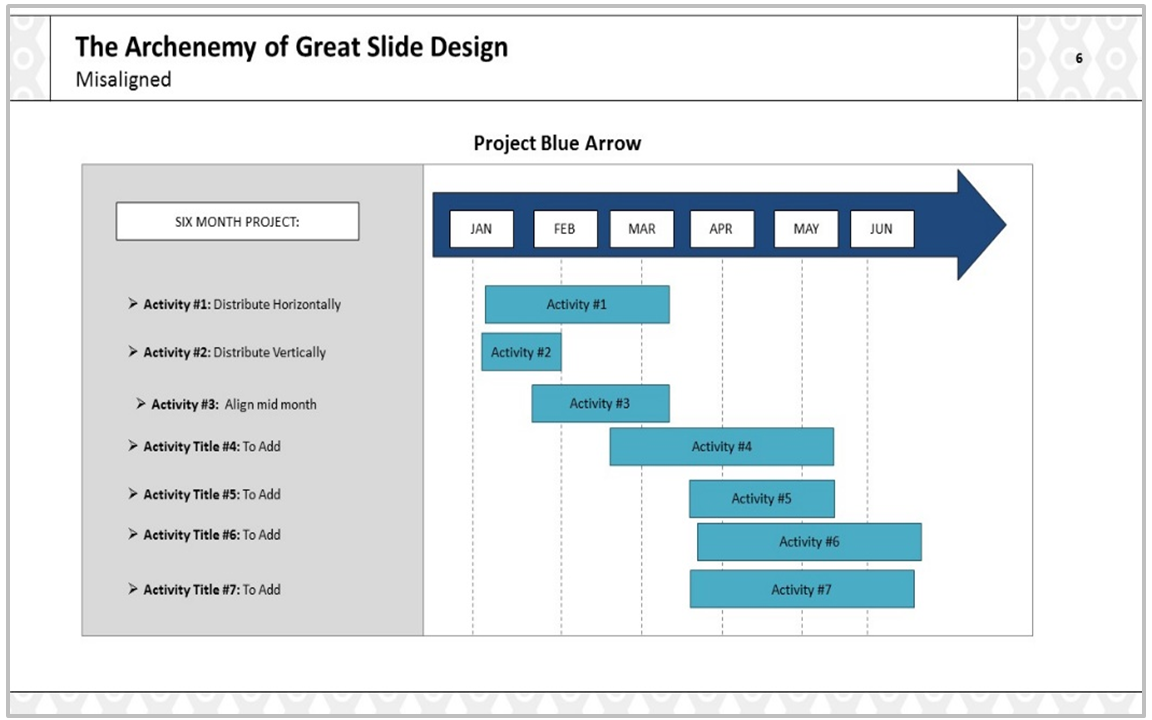

Can you spot all the ever-so-slightly misaligned shapes and text boxes? They’re small but once noticed, they stand out like a really sore thumb!
And honestly, after spotting one of these in a deck, most people can’t help but search for all the other little mistakes there might be in the presentation. This is NOT where you want your audience’s attention.
So the question is:
How do we go about eliminating misalignment to make our slide layouts look more polished and professional?
Quick Fix: The Align Tool
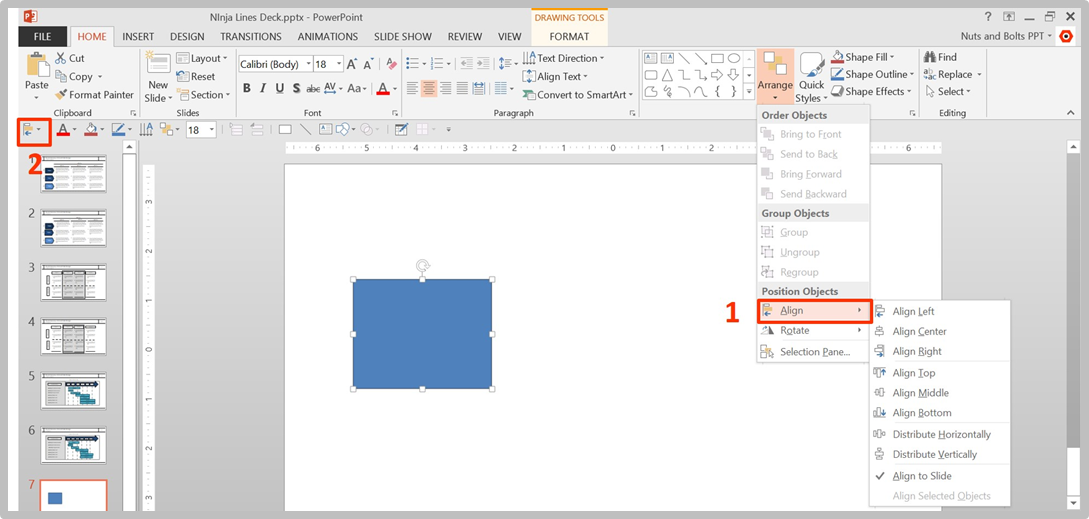
You may already know about the Align Tool. It’s one of our favorite PowerPoint tools as it helps us ensure that our shapes and objects are properly aligned and look professional.
If you’ve never seen it before, it’s hidden within the Arrange dropdown menu (1) in the Home Tab, but we’ve placed it first on our Quick Access Toolbar (2).
Here’s a quick 4 minute video tutorial demonstrating how to use the Align Tool like a boss (and how to get it onto your QAT too):
The Align Tool Isn’t Perfect…
And although the Align Tool is great, it’s really only a quick fix for a lot of the common PowerPoint misalignments we slide builders face on a daily basis.
And that’s because there are some limitations to the Align Tool.
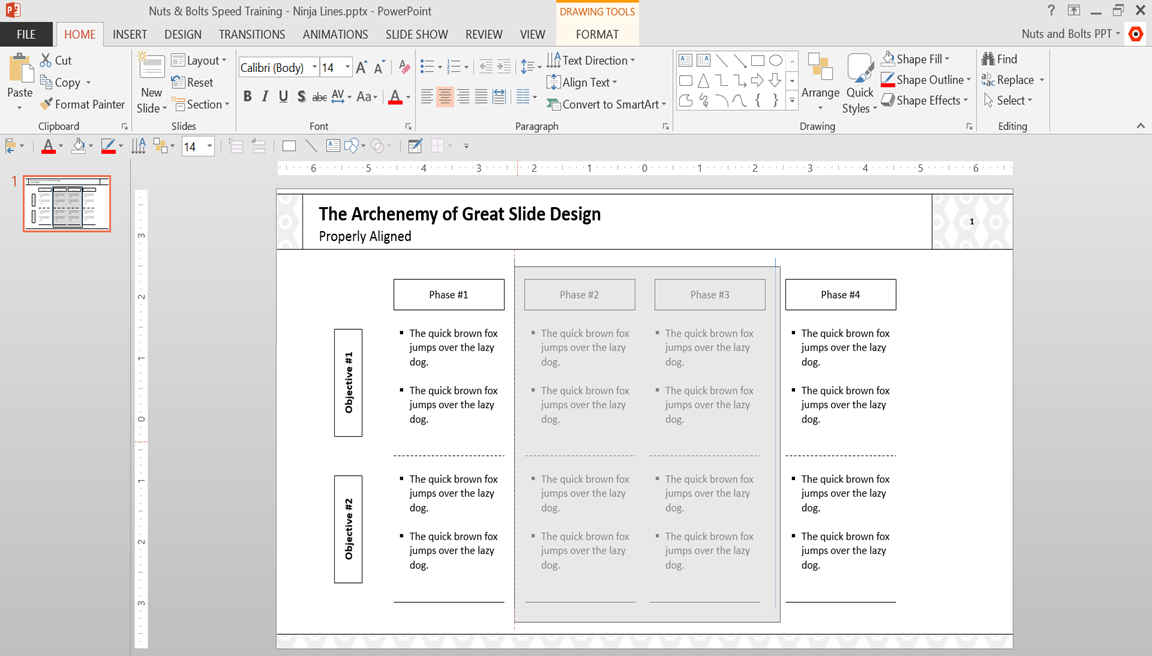
For example, you can’t align the right side of an object to the left side of another object; you can’t align or distribute objects to things that are on the Slide Master; and you can’t align one shape’s side to the spot in between two other shapes (see example below):
So how do you make sure your slide layout is perfectly aligned despite these limitations?
Enter, The Ninja Line!
The Ninja Line is simply a line that appears from the darkness of the night, saves your skin, and then disappears back into the shadows. No really, joking aside, a Ninja Line is an awesome tool that’s super easy to use. Let’s take a look at how it works:
Step #1: Insert a Line
Grab a line, draw it vertically somewhere between the two shapes to create the mid-point you want to align to.
Your first Ninja Line has appeared!
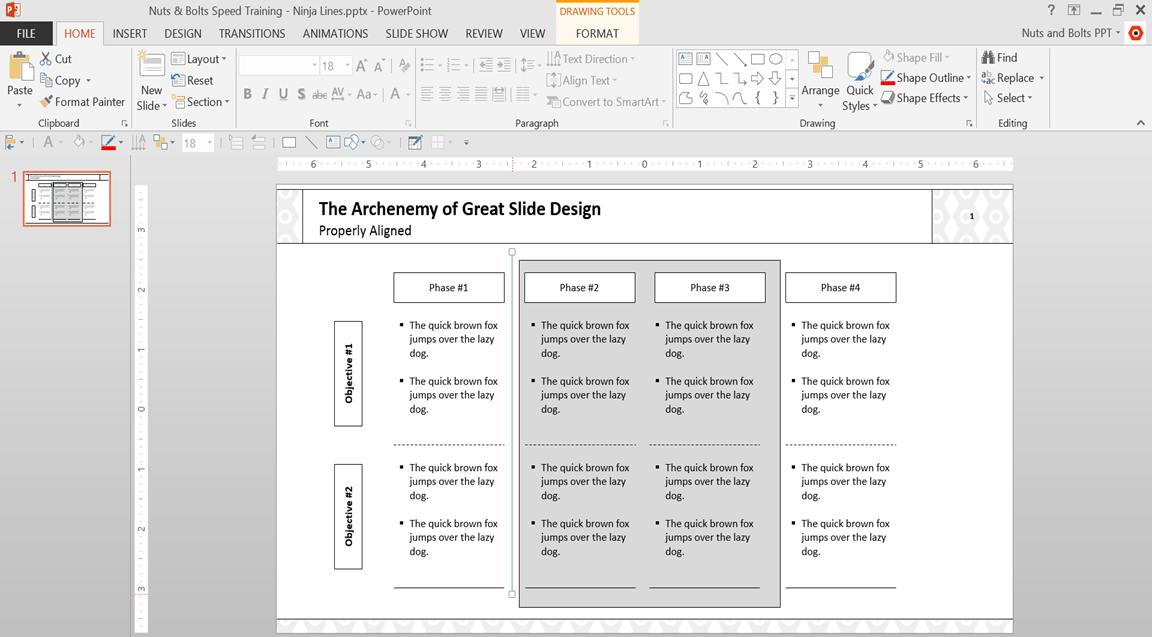
Step #2: Place the First Ninja Line
With your Ninja Line on the scene, you’ll need to place it in the exact middle. So with your Ninja Line selected, hold Shift and select the two rectangles on either side of it.
Then, go to the Arrange tool and in the dropdown menu, select Align, and then Distribute Horizontally.
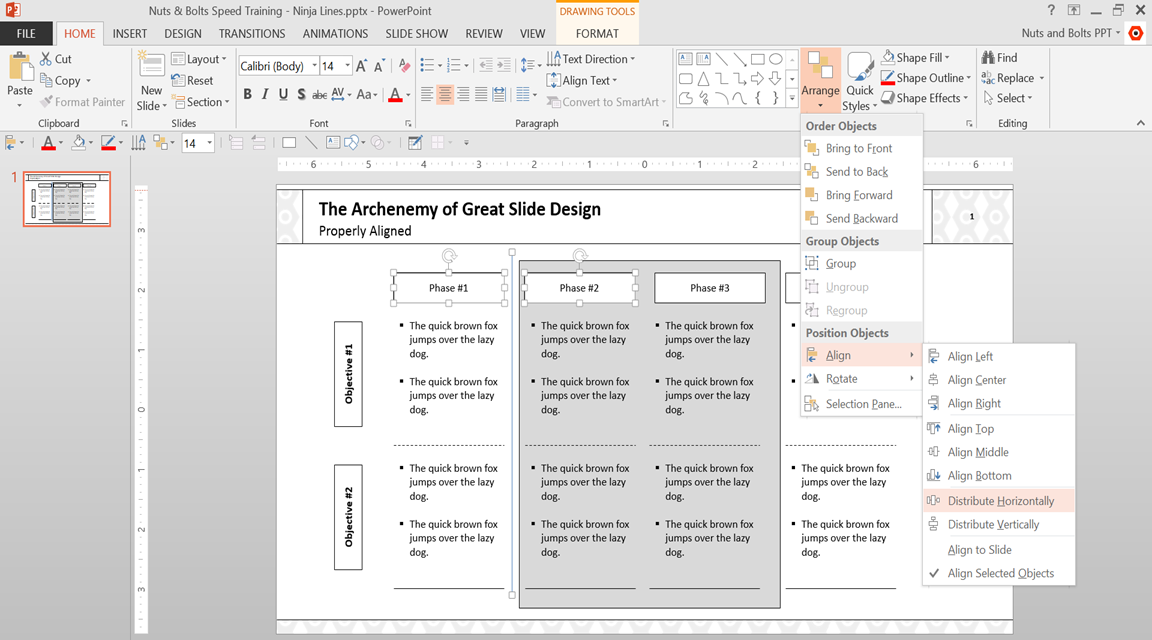
Now the first Ninja Line is in place, perfectly positioned in-between the Phase 1 and Phase 2 rectangles.
Step #3: Create the Second Ninja Line
Now we need our second Ninja Line. Instead of grabbing a new line, let’s just reuse the one we currently have.
So select the Ninja Line, and holding the Ctrl and the Shift keys together, drag the line to the right to create a second identical line.
Step #4: Place the Second Ninja Line
With the second Ninja Line somewhere between Phase 3 and Phase 4, let’s place it perfectly in the middle. So with the Ninja Line still selected, hold Shift and select the two outer rectangles.
Then, go to the Arrange tool and in the dropdown menu, select Align, and then Distribute Horizontally.
Now the second first Ninja Line is in place, just like the first one. And as you can see, the grey rectangle is definitely very off – so good thing we’ll be fixing this soon!
Step #5: Align the Grey Rectangle
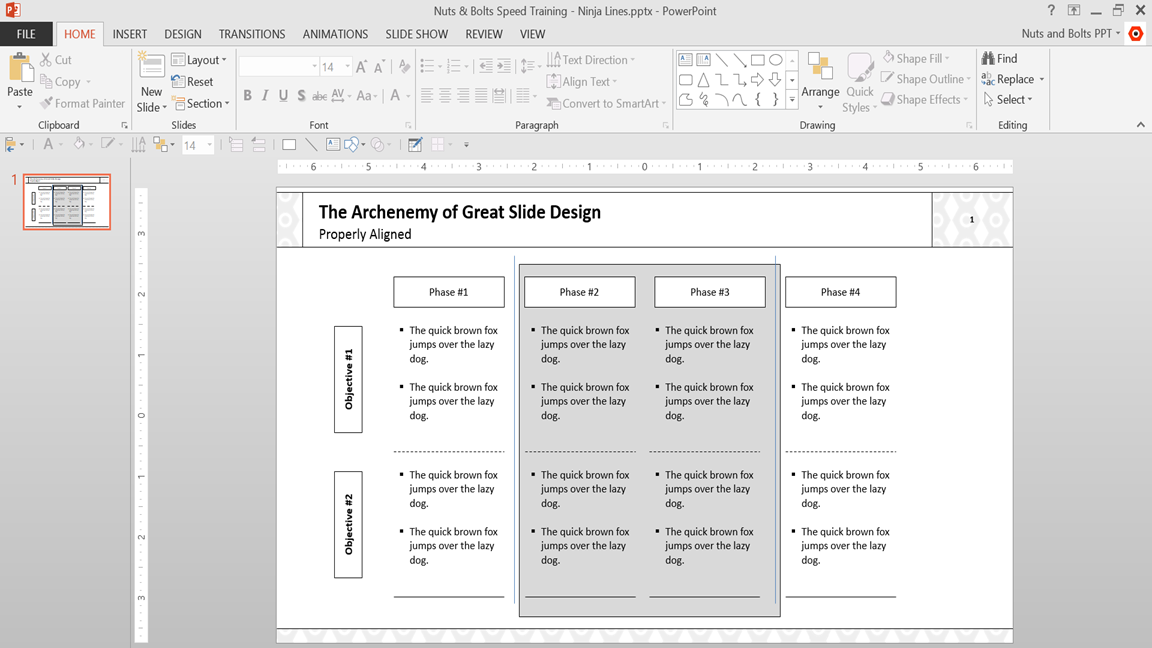
With our Ninja Lines in place, it’s now super easy to align the grey rectangle. All we have to do is drag each side towards the Ninja Lines and PowerPoint will automatically snap them into place.
Step #6: Delete the Ninja Lines
Now that the Ninja Lines have done their work defeating your misalignment foe, you can send them back into the night.
So simply hold Shift, select both Ninja Lines, and hit Backspace.

What Else?
The Ninja Line is an awesome PowerPoint tool that you’ll find yourself using more and more once you become familiar with it. Here are some other great ways the Ninja Line can come in and bail you out:
- Aligning the left and right sides of shapes
- Aligning the tops & bottoms of shapes
- Aligning objects to elements on the master slides
- Aligning larger objects’ middles to smaller objects’ middles (the larger object usually will pull the smaller object to it)
We cover all these types of Ninja Line alignments in our PowerPoint Speed Training Course if you’d like to take your skills further.
Now that you have the Ninja Line in your defenses, there’s no misalignment foe too big to defeat!
The New Way to Crank Through Your Slide Decks in Record Timing
What if you could build solid, professional slides, faster than anyone else around you?
Imagine what that would mean…
No more spending a huge amount of time, energy and frustration to build, update and edit those slides.
You’d learn FOR LIFE a systematic and repeatable process to crank through your decks in record timing…. and actually spend your time on more strategic tasks that allow you to move up the value chain.
If that’s something you’re interested in, then check out Advanced PowerPoint, Nuts & Bolts Speed Training’s ultimate online course.
Here’s a quick preview of what you’ll learn inside:
- Spend less time formatting: 40% or more of people’s time in PowerPoint is currently wasted on repetitive formatting and alignment tasks…The course will show you how to eliminate many of these.
- Become a keyboard jockey: Everyone knows that power users use their keyboard for just about EVERYTHING…Advanced PowerPoint will show you exactly when and where to use your keyboard, and help you build the muscle memory so that it sticks.
- Make better deck decisions: Many great “dream” slides become re-haul “nightmares” when you have to update or rework them later… This course will show you how to make better decisions on the front end of your deck so that your slides are easy to update and manage when things change…as they always do.
- And much more!
If you want to explode your productivity at PowerPoint and save hours using the software, check out the course’s full scope here.
It’s one of the most comprehensive speed training courses on PowerPoint anywhere – period.